Halloween is tomorrow and this year I'm off to a party.
Instead of thinking about my costume, I thought about what sweet treats would be great to make and take along. That's when I remembered seeing some cute Ghost meringues on the Meringue Girls Instagram last week and thought it would be fun to make them.
These girls are great and, their meringues are divine. Move over cupcakes as these are the best sweet treat right now!
You will need:
Piping bags - Lakeland disposable ones are great
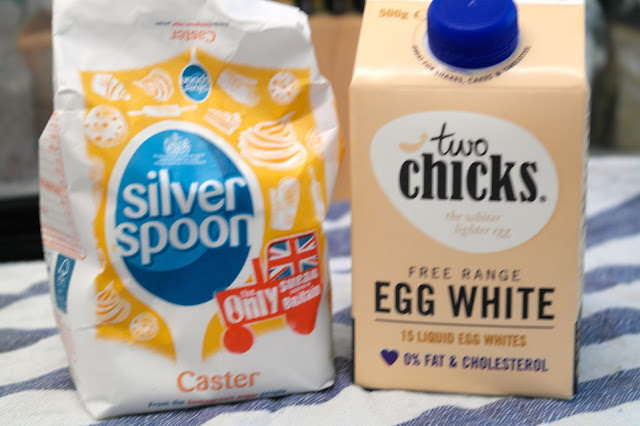
200g caster sugar
100g free-range egg whites (3-4 eggs).
*I used Two Chicks liquid egg whites which is what the Meringue Girls use*
Preheat the oven to 200C/gas mark 6. Line a small, deep tray with baking parchment, pour in the caster sugar and heat it in the oven until the sugar is just beginning to melt at the edges. Heating the sugar helps to create a glossy, stable mixture.


Pour the egg whites into a mixer and whisk them slowly, allowing small stabilising bubbles to form, then increase the speed until the egg whites form stiff peaks.
Take the sugar out of the oven. With your mixer on full speed, slowly spoon the hot sugar into the beaten egg whites, making sure the mixture comes back up to stiff peaks after each addition of sugar.
Once you have added all the sugar, continue to whisk on full speed for five to seven minutes.
Feel a bit of the mixture between your fingers; if you can still feel the gritty sugar, keep whisking at full speed until it has dissolved and the mixture is smooth, stiff and glossy.
*IMPORTANT - at this point, turn your oven down to 100C*
Next, grab a tall drinking glass and place your piping bag inside it - this will help you spoon the meringue mixture into it without any mess. Half fill the bag with mixture and cut the tip of the bag off.
Line a baking tray with baking paper. To get the 'Ghost' shape, you need to swirl the meringue mixture.

 Then, pop them in the oven for an hour until they're set and lift easily off of the baking tray.
 When they've cooled, get some black food colouring and a brush, and draw eyes and a mouth on each one. So you end up with something like this:


This is the easiest recipe you will come across and, it's quite healthy as well.
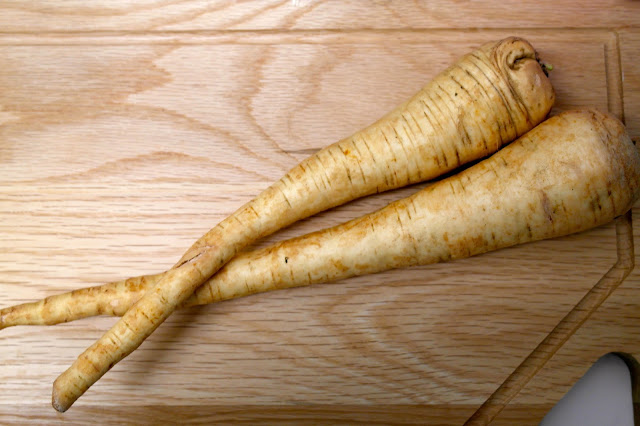
All you need is a couple of Parsnips, Sunflower Oil and some salt.

Heat a large glug of the sunflower oil in a saucepan. Whilst this is heating up, peel your Parsnips.
Get rid of the skins. You just want the white bits.

Once the oil is hot enough (you need it REALLY hot) place a small handful of the peelings into the pan. They should start sizzling immediately.
Leave them in there for a few minutes, or until they are crisp and golden.


Place some kitchen towel on the chopping board and with a slotted spoon, scoop the parsnips out of the oil and onto the board. Leave to cool.
Keep chucking the peelings into the oil until you don't have anymore.
Once they've cooled down, place them in a sandwich bag with a pinch or two of salt and shake it like a polaroid picture.

A perfect snack for sitting out the storm - they'll be gone in minutes.


For me soups and chowders are one of the most comforting dinners - they're filling and, if you make enough they're great for lunch the next day.
I've only ever had Chowder when eating out but I thought I would give it a try at home and as it turns out, it's really easy.
Ingredients (serves 4)
25g butter
1 medium onion, finely chopped
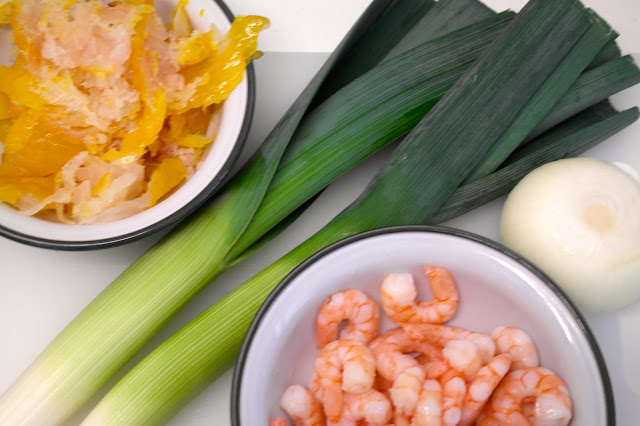
2 Leeks
600ml milk
300ml fish stock made with 1 Fish Stock cube
handful of new potatoes, chopped into cubes
450g traditionally smoked haddock fillet, skinned
225g cooked and peeled prawns
Lemon juice, to taste
Freshly ground black pepper
Heat the butter in a large heavy pan. Add the onion and cook gently for 10 minutes until soft. Add the milk and stock and bring gently to simmering point.


Cut the haddock into bite-sized pieces and add to the pan. Cook very gently for 6 minutes, then add the prawns, lemon juice and pepper.

 Cook for a further 2 minutes then serve. If you have any fresh, crusty bread with a smidge of butter use that to mop up the dregs at the bottom of your bowl.


Although it may not look very appetising, I promise it's delicious!
Now Summer is over and I can't spend my evenings and weekends on the beach, the kitchen is calling me even more than normal.
I'm a huge fan of using peanut butter in baking. Put it with bananas and chocolate and you get a great flavour combination.
Ingredients
120 ml sunflower oil
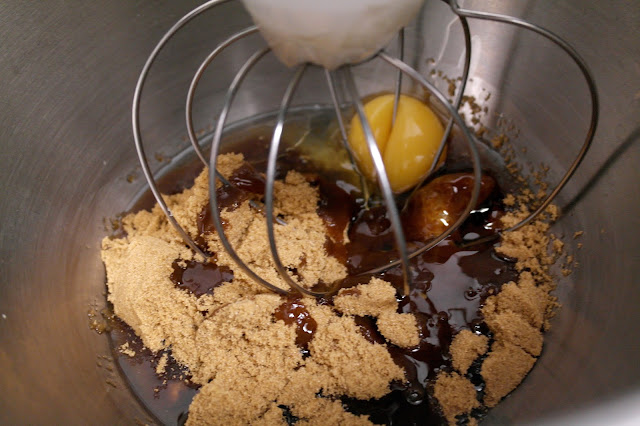
225 grams light brown muscovado sugar
3 large eggs
225 grams self-raising flour
2 medium bananas (ripe)
150 ml natural yoghurt
50 grams chocolate chips
3 large reese's peanut butter cups - if you can't get these (my local Tesco had sold out) then use a little more peanut butter and chocolate chips.
70 grams smooth peanut butter 50g for cake, 20g for top
Sift flour into bowl and fold into mixture.

 Mash bananas and fold into mixture with the natural yoghurt.
Chop peanut butter cups and fold into mixture, along with the chocolate chips. Pour mixture into loaf tin.
 Melt the 20g of peanut butter on the hob or in a microwave. Dollop the runny peanut butter on top of the mixture and swirl with a fork.


I'm a huge fan of using peanut butter in baking. Put it with bananas and chocolate and you get a great flavour combination.
Ingredients
120 ml sunflower oil
225 grams light brown muscovado sugar
3 large eggs
225 grams self-raising flour
2 medium bananas (ripe)
150 ml natural yoghurt
50 grams chocolate chips
3 large reese's peanut butter cups - if you can't get these (my local Tesco had sold out) then use a little more peanut butter and chocolate chips.
70 grams smooth peanut butter 50g for cake, 20g for top
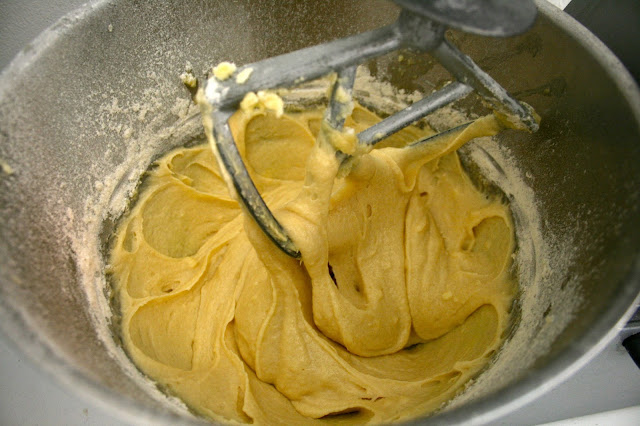
Preheat oven to Gas4/180C. Line a 2lb loaf tin with baking paper (or use a ready made loaf tin liner).
Using a whisk, mix together the oil, sugar and eggs (1 at a time). Beat in the 50g peanut butter.

Sift flour into bowl and fold into mixture.


Chop peanut butter cups and fold into mixture, along with the chocolate chips. Pour mixture into loaf tin.

Bake for around 1hr 20 mins until a skewer inserted into the cake comes out clean. Check cake after 1hr and place foil on top if you feel it's getting too dark.
Leave to cool and then eat!


Sometimes a recipe comes along that gets me a little flustered.
This was one of them.
I first came across this recipe on my favourite blog, The Londoner and she found it on Martha Stewart's website. I have to admit, after reading Rosie's post, it sounded so simple all my apprehensive feelings disappeared.
Plus, anything that doesn't involve too much washing up for the man of the house is a bonus.
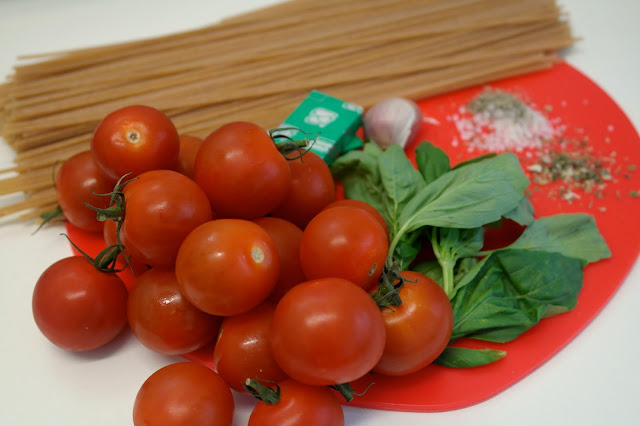
Ingredients
6oz spagetti
6oz chopped cherry tomatoes
1/2 an onion, thinly sliced
1 large clove of garlic, thinly sliced
2 or 3 sprigs of basil
2 tablespoons olive oil
1tsp dried oregano
Sprinkle of chili flakes
Salt n pepper
2 cups (16 fl oz) of warm vegetable stock
Grated parmesan

Now, put all your ingredients (except the Parmesan) in to a big pan and pour over your stock.

Cover & bring to the boil. Once it's boiling, turn the heat down so it gently simmers away, stirring it now & then. Cook like this for 5mins, then remove the lid altogether and keep stirring until the water's all gone.
Serve, with a generous helping of Parmesan.

So easy and delicious, you'll want to make it the next night.
Roast chicken is one of my favourite things to cook. There are so many ways and flavours to try I never get bored and can usually be found whipping one up on a Sunday afternoon.
I thought it would be rude of me not to share one of my favourite ways of cooking a roast chicken. What's great about this one is that the leftovers (if any) make a really yummy sandwich.
You will need:
1 x free-range chicken
1 x large lemon
4 x cloves of garlic, squashed
75ml/3fl oz olive oil
Some sprigs of fresh Thyme
Salt and freshly ground pepper
Preheat the oven to 220C/425F/Gas 8.
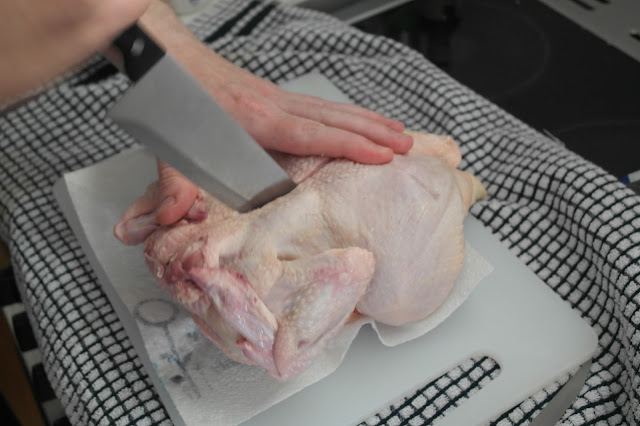
Place the chicken onto a chopping board and cut in half down the backbone using a large and very sharp cooks’ knife. If you don't have the strength, do what I do and get the man of the house to do it for you.
Flatten the chicken as much as you can buy pressing down with the palm of your hand. This method is call spatchcocking.

Yes, I giggle saying it as well.
Pour the olive oil into a mixing bowl (large enough to take the chicken), add the squashed garlic cloves, the juice from the lemon and then the squeezed lemon shells. Put in the sprigs of thyme, a good seasoning of salt and black pepper, then turn the chicken over in the oil. (If you have the time, you can leave the chicken like this for an hour or so.)
 Place the chicken in a roasting tin, skin-side up. Roast for about 30 minutes or until the skin is golden and the bird cooked right through.


I like serving mine up with roasted new potatoes, coleslaw and some salad. But, it's also great with all the normal roast dinner trimmings. Plus, the juices from the chicken make a great stock - shove it in a tupperware and use it in a risotto or as part of a pasta sauce.
Enjoy!
Last month, my friend Rupert turned 30. It was a big celebration - full of delicious food, a cocktail bar in the back garden, a continuous game of bar billiards and dancing until the sun came up.
Honestly, cake anytime is good but, when it's your birthday it's even better.
I decided to surprise Rupert with one that I'd seen pop up a few times on the Internet. With the help of my lovely friend Kirsten, we set to work baking and decorating a cake that would mess with peoples heads but also be good enough to eat.
I think we did quite well. So I've decided to share the recipe and ideas behind it all.
To make the 'Bun' I used the queen of baking, Mary Berry's Victoria Sponge recipe. I doubled each ingredient so each bun was 'fatter'. No one likes a skinny burger bun.
You will need:
450g unsalted butter, softened
450g caster sugar
8 large free-range eggs, at room temperature
1 teaspoon of vanilla extract
450g self-raising flour, sifted
2 tablespoons of milk
Preheat oven to 180 degrees. Grease and line your baking tins with baking paper (2 x 20.5cm tins)

Sift the flour again, this time into the mixture and add the milk. Gently fold through the flour into the mixture with a metal spoon. Stop folding when there are no streaks visible in the mixture.
Spoon the mixture into the tins so they are equally filled. Spread evenly, right to the edges.
Bake for 35-40 minutes or until golden brown and the sponges are springy when you gently press them with your fingertips.

For the 'patties' I relied on Mrs Crocker and her magic boxes of cake mixes. Her chocolate brownie one is great if you just don't have the time to bake from scratch. I usually make my brownies from scratch but, time was ticking and there were BBQ ribs to be eaten at the party.
and nothing is getting in the way of me and meat.
You can buy the chocolate brownie mix from all supermarkets in the UK. I used two boxes and made two brownies as I was going for a double cheeseburger look. Make sure you allow the brownies to completely cool before you start the fun part.

 Now, for the decorating.


You will need:
1 block of yellow fondant icing
1 block of green fondant icing
Red food colouring
Butter
Icing sugar
Milk
I always head to Lakeland to buy bits for decorating cakes. They have a great selection online and in store.
Roll out the yellow fondant icing and cut into squares. This is going to be your cheese. Do the same with the green fondant icing but, use a medium-sized crinkled, biscuit cutter and cut some shapes out. These will be your pieces of lettuce.


Grab one of your sponges and place on the surface you are going to use for the base. Make up some buttercream (butter, milk and icing sugar). Spoon some onto the centre of the sponge and spread out so it covers the whole cake. Add some of your lettuce leaves to the edge of the sponge and then place one of the brownie patties on top, ensuring the lettuce is visible around the edges. Add more of the buttercream on to the brownie and place the second brownie on top.

 Now, you should have one sponge left. Before placing this on, add the 'cheese' slices and remaining 'lettuce leaves' to the brownie patty. Spoon some more buttercream mix on to the brownie and place the sponge on top. With the leftover buttercream, add some red food colouring to it, making sure it looks like tomato ketchup. Add a large dollop of it to the center of the brownie. If you have any leftover, you can put it in a piping bag and decorate like we did.


Now, no hamburger would be complete without fries. I decided that making a batch of sugar cookies were the best way forward.
You will need:
100g unsalted butter
100g caster sugar
275g plain flour
1 egg, lightly beaten
1 teaspoon of vanilla extract
Cream the butter and sugar in a bowl. Gradually add the egg and vanilla extract and beat until mixed in. Stir in the flour until the mixture forms into a dough.
Roll out the dough onto a lightly floured surface and cut into thin strips with a knife. Bake on a lined baking tray for 8-10 minutes.

 The finished piece!
Roll out the dough onto a lightly floured surface and cut into thin strips with a knife. Bake on a lined baking tray for 8-10 minutes.


Job, done x
Breakfast is (allegedly) the most important meal of the day. I'm sad to admit, that during the week I tend to skip breakfast and grab something on my way into work to eat later on. Naughty Laura!
However, breakfast at the weekend is slightly different. After a little lie in and no snooze button to hit several times, I like to make these little cups of breakfast joy. I first saw these whilst procrastinating on Tumblr last year and, having managed to track the recipe down - I haven't looked back. A favourite with loved ones, they are very simple to make and, less stressful than cooking a huge fry up.
To create these, you will need;
Bacon (1 rasher per cup)
Eggs (1 egg per cup)
Bread (brown or white)
A little bit of Butter
2 teaspoons of Maple Syrup
Salt & Pepper
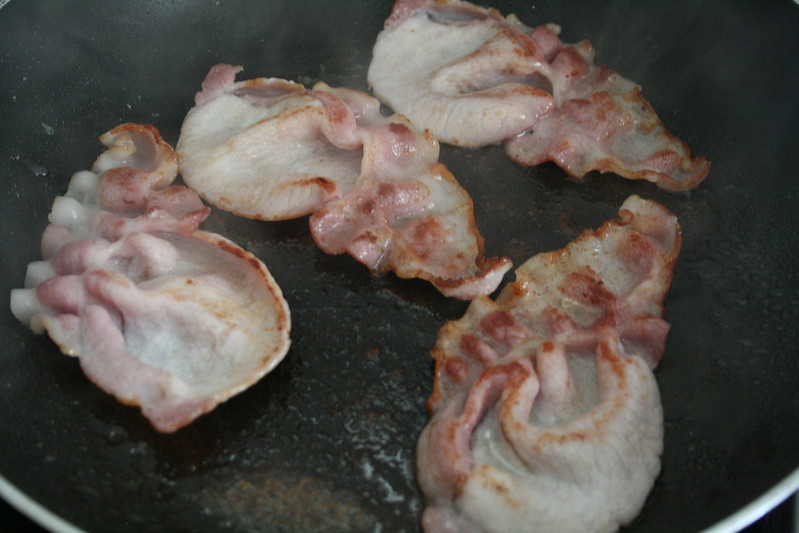
Pre-heat your oven to 200 degrees. Whilst that's heating up, fry your bacon rashers on a medium heat until cooked. You want them to be firm but not too crispy.
Heat your butter until melted. Add maple syrup and mix together.
Using a cookie cutter, or anything that will cut a 3 inch diameter circle, cut circles out of your bread. You may have to do some trimming depending on the size of your bun tin molds. Easy enough though.

Grease a bun tin and pop your bread circles into the molds. Cut your bacon lengthways (I used scissors) and line each bun mold with the bacon. You will find that one rasher will be enough for each mold.
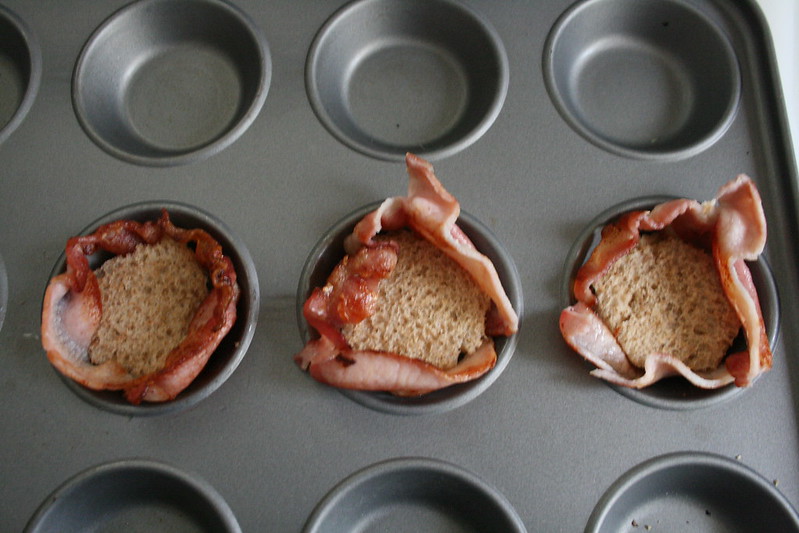
Brush the bread circles with the butter/syrup mixture.
Now, crack your eggs and pop on top of the bread, ensuring that the egg doesn't leak through the bacon. Depending on the size of your eggs, you may want to get rid of some of the egg whites before popping the eggs onto your bread and bacon cups.

Season with salt and pepper.
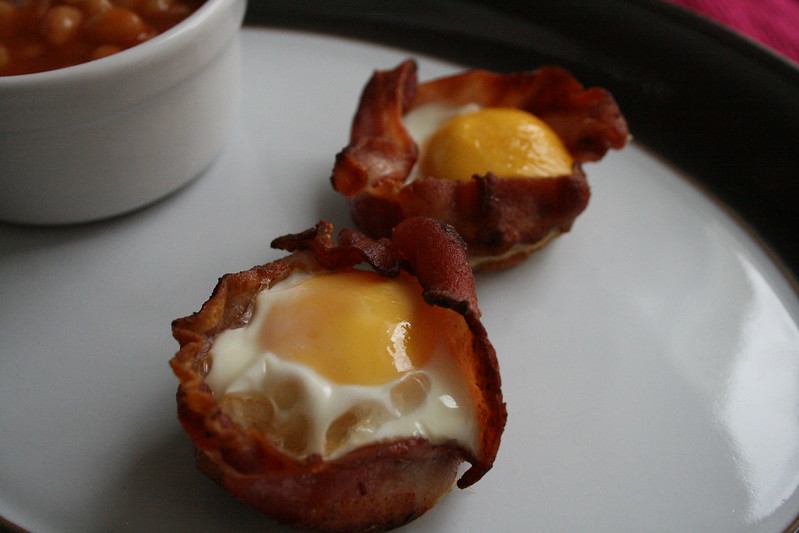
Place in the oven for 7-8 minutes. This will give you a runny yolk. If you prefer it to be more solid. Bake for 10 minutes.
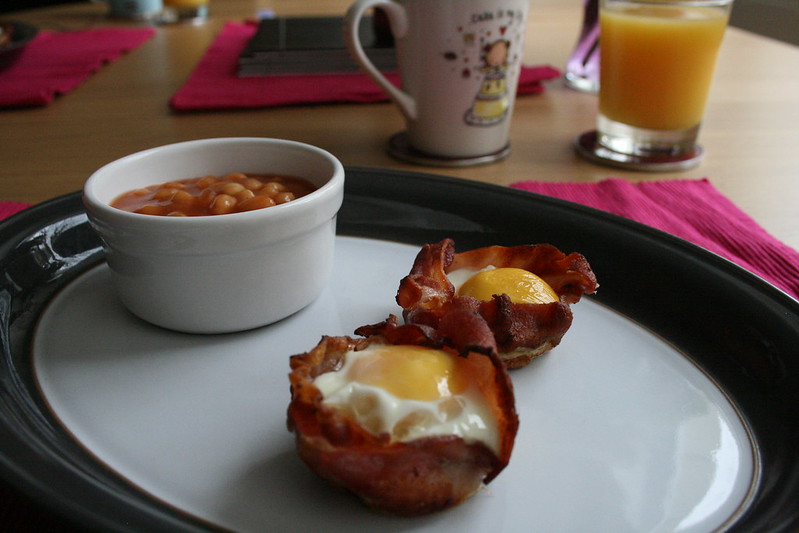
A perfectly yummy way to start the weekend.
Serve with lots of tea (me) and coffee (him).

Subscribe to:
Posts (Atom)


Social Icons